If you register your information on the event participation page (EventHub), you will be able to interact with other participants.
Expand your business opportunities by utilizing the business matchmaking function!
Search
You can use the search function to easily find the right participants for your goals.
1
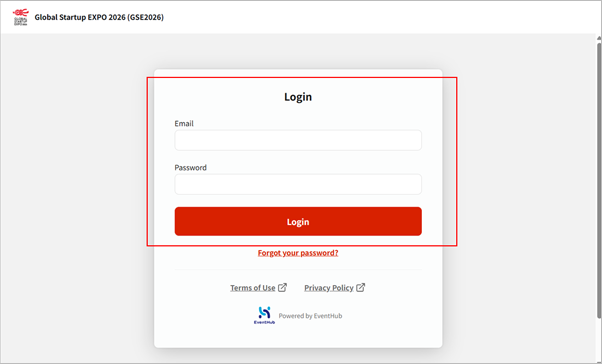
Log in to the Global Startup Expo 2026 event participation page (EventHub).
2
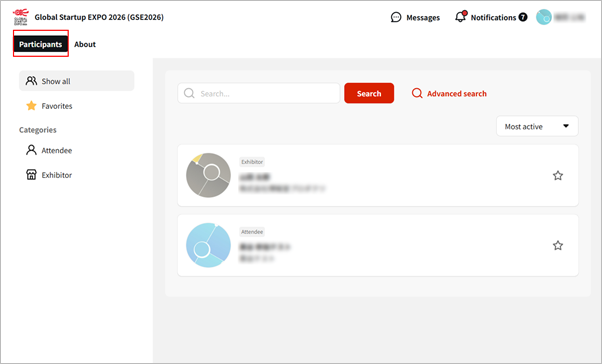
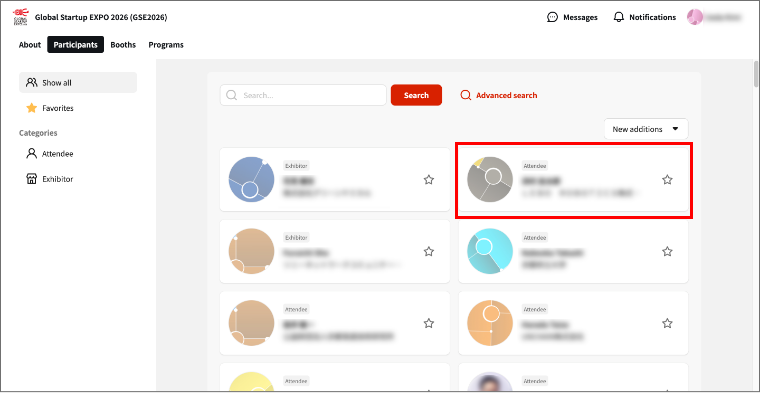
Find people you want to interact with from the “Participants” tab.
Message
You can send a direct message to someone you are interested in.
1
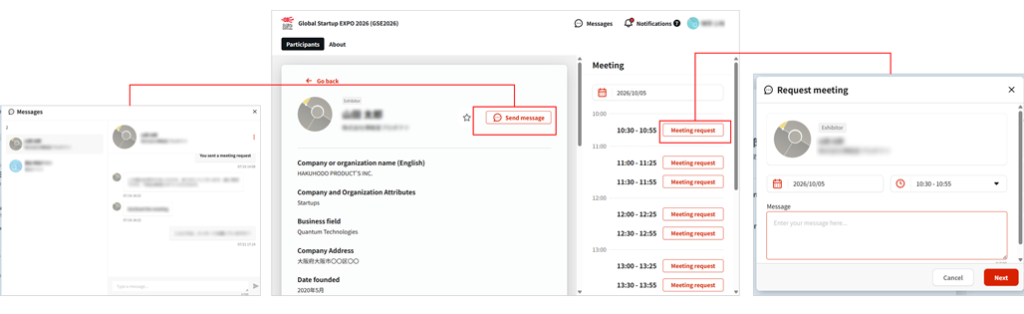
Click on the person you are interested in, and then click either “Send Message” or “Request Meeting.”
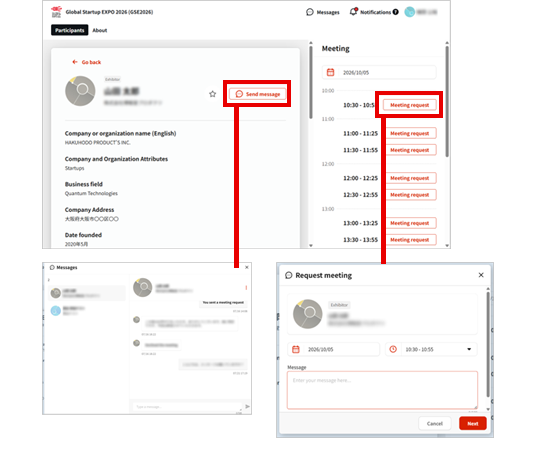
2
After entering and sending your message, wait for a reply or approval from that person.
*The reply or approval will also be sent to your registered email address.
3
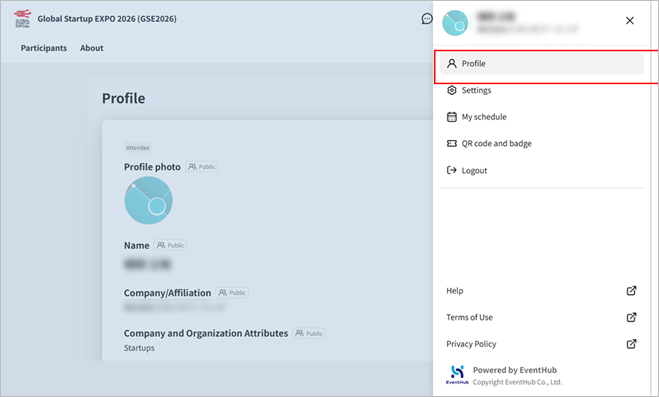
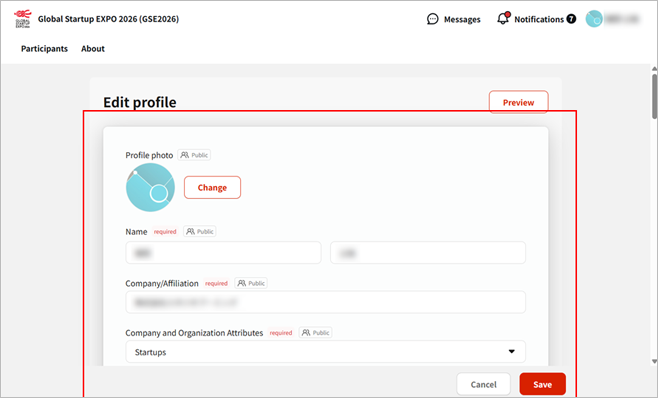
You can edit your registration information by clicking on your name in the upper right corner of the screen to display “Profile.” Use this function if you wish to change the information you previously entered, or if you would like to add a profile picture or other optional information.
Items marked with the [Public] label can be viewed by other registered users.
Items marked with the [Private] label cannot be viewed by other registered users.
*Your email address cannot be changed.
Meeting Room Booking & Direct Negotiation
You can reserve a meeting space for a business meeting on the day of the event.
1
Click the profile of the person you would like to meet from the [Participants].
Check their available schedule, then click [Meeting request].
Time slots that are already booked for a meeting will be displayed as [User(Other Participant) is busy], and the [Meeting request] button will be disabled.
Add a comment, then click [Next] > [Submit].
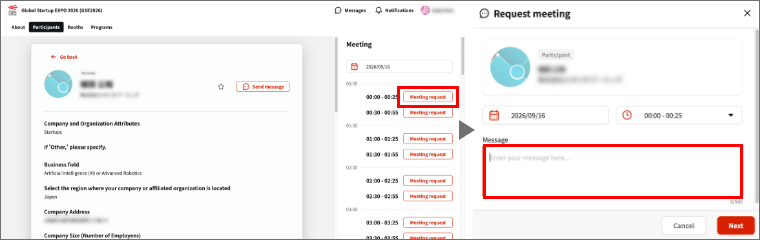
2
Wait for the other participant’s approval.
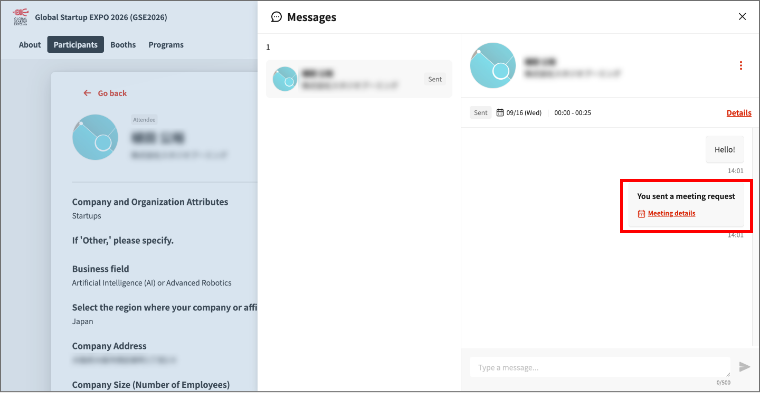
3
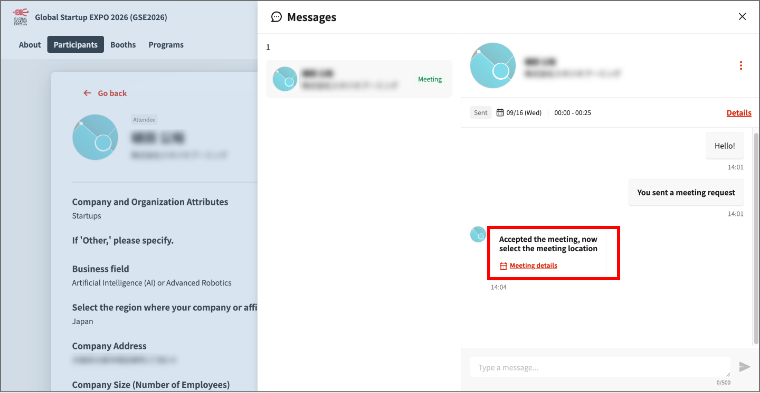
Once the other participant [Accept] your request, you will receive a message saying, “Accepted the meeting, now select the meeting location.”
A notification will also be sent to your registered email address.
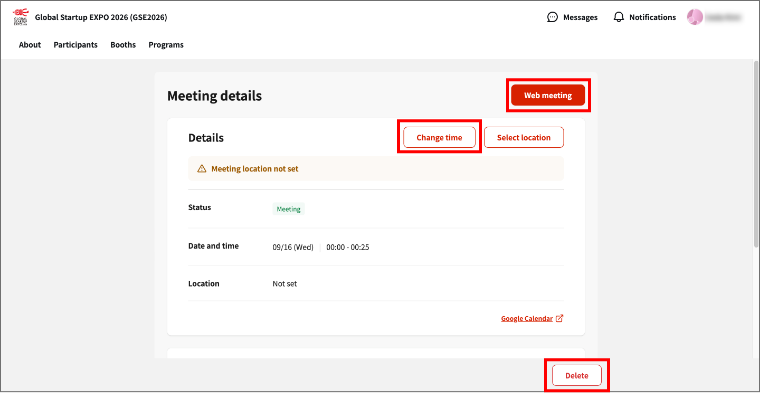
From the meeting details, you can start a web meeting, reschedule the meeting, or cancel it.
When meeting in person during the event period.
During the event period, you can hold an in-person meeting in a designated area at the event venue.
Please follow the steps below to select a location for your meeting.
The person who received the meeting request
1
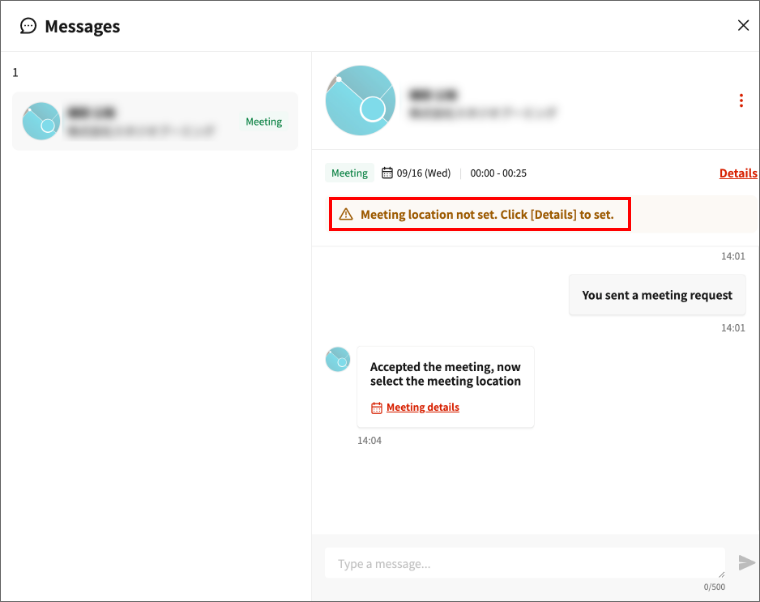
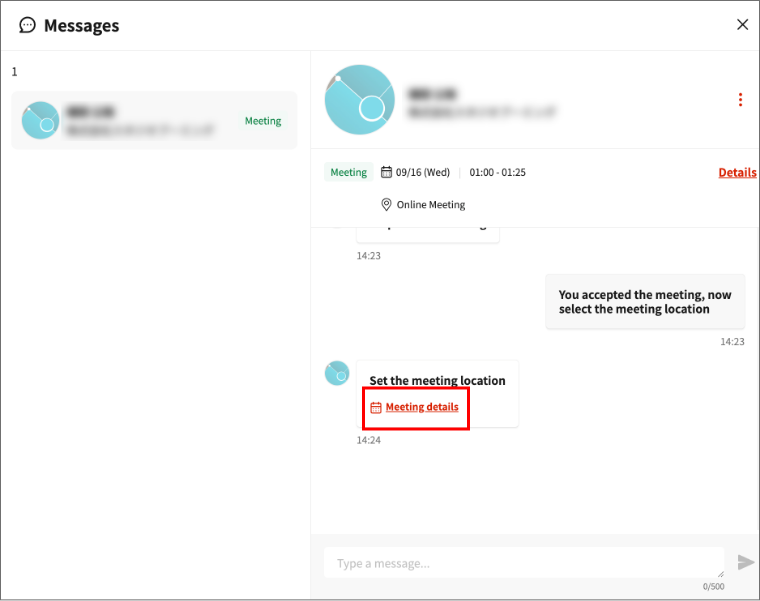
Once the request is approved, you will receive a message saying, “Accepted the meeting, now select the meeting location.”
Click [Meeting details], then select a meeting location on the meeting details screen.
2
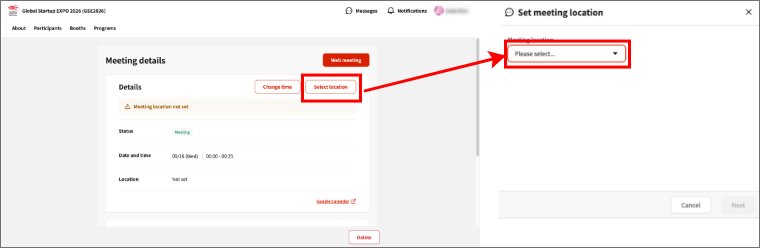
From the Basic Information section on the Meeting Details screen, click [Select location] and select a meeting location.
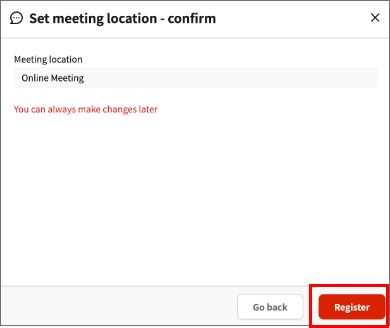
After selecting a meeting location, click [Register].
*The meeting room location can be changed later.
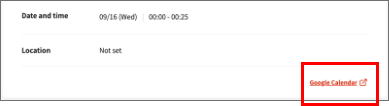
You can add the meeting to Google Calendar from the Meeting Details.
Click [Google Calendar] to add the meeting to your Google Calendar.
The person who received the meeting request.
A notification that the meeting location has been registered will be sent to your message box.
Similarly, select [Meeting details], then click [Google Calendar] in the Participants section to add the meeting to your Google Calendar.
When holding an online meeting before the event.
Once a meeting request is approved, you can use the web meeting feature.
The web meeting system used is a tool called Whereby.
1
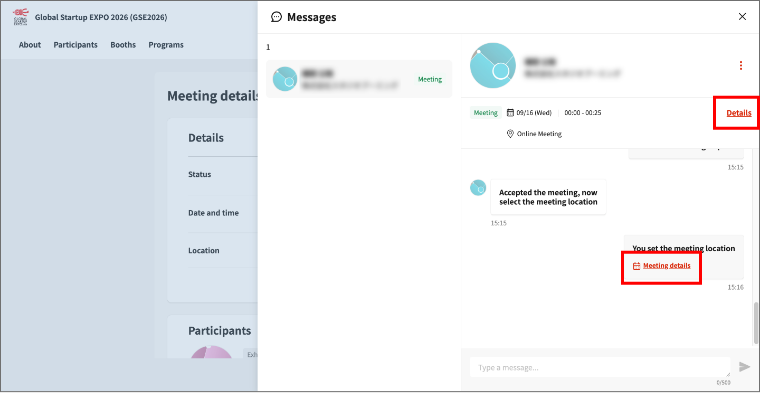
After you send a meeting request and the other participant approves it, a [Details] link will appear in the upper-right corner of the message box. Click it to open the Meeting Schedule Details screen.
2
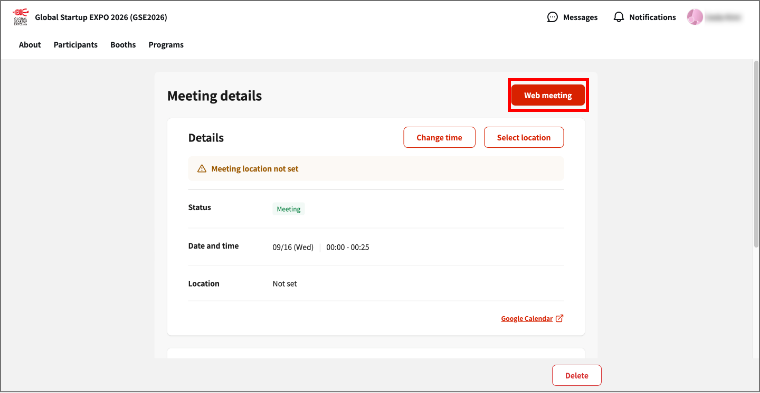
Click [Web meeting] in the upper-right corner of the screen to open the web meeting feature (Whereby).
*The Whereby link generated here is unique to each pair of participants. Once generated, the link will not change.
3
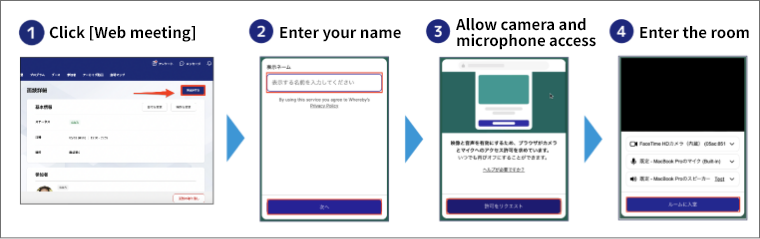
Enter the name you would like to display on Whereby, allow access to your camera and microphone, and enter the room.
4
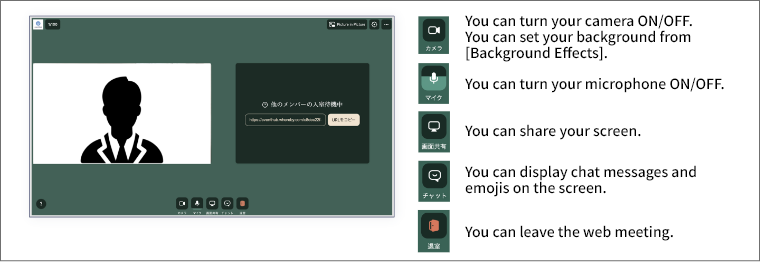
Wait for the other participant to join the room. If you would like to set a background, go to [Camera] > [Background Effects].